No products in the cart.


How To Create Transitions For Your Songs In Ableton Live
The Reverse Cymbal
Simple, yet effective, the reverse cymbal effect is a great way to quickly introduce a breakdown.
1.) Grab a sample of a crash cymbal with a fairly long decay.

2.) Drop it into Ableton’s Arrangement View.
3.) Click the sample once and open the clip waveform view.

4.) Under the sample section click the “Rev.” button.

5.) If your cymbal has enough decay, the build should last for about 1 measure.
6.) Make sure it buttes right up theto end of the measure before the breakdown.

7.) Add Reverb to taste.
The Reverse Vocal Swell
Reverse vocals swells are not only great for transitioning to certain a chorus or a breakdown, but also very effective at leading into vocals.
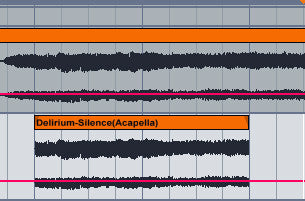
1.) Start an audio track underneath your vocal or acapella track in Arrangement View.

2.) Select a small snippet (usually 1 bar will do) from the vocals and copy it (Ctrl+Drag) into the newly created audio track.
3.) Add a Reverb to the audio track with the copied vocal snippet.
4.) Crank the reverb decay up to about 6-7 seconds.
5.) Start one more audio track (3 total, including the original), and set it’s audio source to the track with the 1 bar audio snippet and Reverb.

6.) Arm the new empty audio track and record the reverb/snippet vocal. Make sure to let the entire reverb tail fade.

7.) You can delete the snippet track, but keep the newly recorded version.
8.) Click on the newly recorded part and reverse it using step 4 in the “Reverse Cymbal” section above.

9.) Place it right against the main vocal melody and fine tune the end of the swell with volume automation and cropping.
The Machine Gun Snare Roll
This technique is used a lot in Trance, where build ups can be (what seems like) hundreds of measures long. I’ll show you the beginnings of how to do a short snare roll.
1.) Find a sample semi-realistic snare drum with a fast attack and a short decay.
2.) Load it into a MIDI track with drum rack. Be sure to click show/hide devices and turn the release all the way up, and the velocity to 100%.

3.) Create an 8 measure MIDI clip on this track, and set your drum grid to 1/32.
4.) Program one 32nd note at full velocity, and the second at about 70 – 80.

5.) Copy and paste all of the notes to fill the 8 bar loop.
6.) Use the volume automation (on the mixer, not drum rack’s) to slowly build the snare roll in.

7.) Optional: Introduce claps every 2 and 4 of the beat.
The “Swoosh” Transition
A very simply transition that can be easily achieved with white noise and a low pass filter.
1. Load a copy of Analog or Operator (or any other synthesizer that can generate white noise).

2. Select the 1st oscillator to generate white noise.
3. Record a fairly long note (4 measures for this example).
4. Start the low pass filter at about 600 – 800hz and slowly open it until it is maxed out. Use automation, or record your own filter sweep.

5. Edit to taste with Reverb, volume automation or even delay.
Leave a comment
About Us
- info@soundoracle.net